Cleaning Small-Farm Produce Wash Equipment
The purpose of farm food safety is to assess and minimize the risk caused by microbial contamination. The target audience is smaller growers with limited labor availability. How do we expect farmers to minimize microbial risk for cleaning produce wash equipment when the equipment wasn’t meant to easily come apart for cleaning? What cleaning techniques work? How long does it take? How clean is clean? These questions led to a research project, “Developing BMPs [Best Management Practices] on Cleaning Produce Wash Equipment and Delivering Training to Growers,” funded by the Northeast Center to Advance Food Safety.
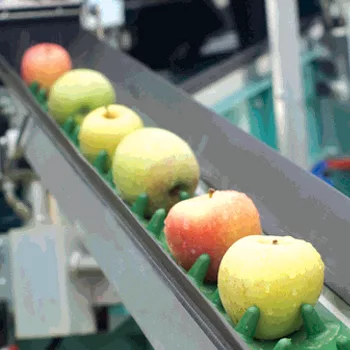
The research began with a basic produce washer setup found on many small vegetable-grower operations. The units can consist of a combination of a conveyor, brush washer, and absorber. Often, sorting and/or packing tables are attached. These units are chain-driven by a motor. Water sprays onto the produce from a set of nozzles as produce moves into the brush washer.
A conveyor has a textured belt moving produce such as peppers, summer squash, tomatoes, or cucumbers into the brush washer. Due to the texture of the belt and closed edges, debris and vegetable oils accumulate, sticking into grooves as it continuously loops around.
Brush washers can have 1–12 sets of spinning brushes with dozens of brush bristle bundles. Vegetable matter gets caught between and within bristle bundles. As the brushes spin with water spraying down, debris is splattered all over the interior of the machine. The water drips into a collection pan below the washer as well as onto the floor.
From the brush washer, the produce is moved onto an absorber. This machine can have seven rows of spinning foam “doughnuts,” 11 to a row. The rows of doughnuts are tightly pressed together, but debris, vegetable oil, and juices can get between them. As the doughnuts spin, water on the produce is wicked off, causing splatter on the sides of the machine, and drips down into another collection pan. From the absorber, the washed produce can move onto a packing table. Workers pick the produce and pack boxes destined for market.
The research investigation included the following:
• Identifying where dirt and debris from the operation of the equipment go
• Identifying where dirt and debris spread when rinsed
• Identifying what tools and techniques work for cleaning
• Trying to verify whether the equipment is “clean” after the cleaning steps
• Developing a cleaning checklist for each piece of equipment
• Determining how clean is clean
“Clean” is defined in our research as “the best that we could get.” The project was initially looking for BMPs, but it was quickly realized that “reasonable management practices” may be the most realistic goal. Research on the microbial level conducted at the University of Massachusetts found that even with very high levels of sanitizer, microbial swabs still could find bacteria within produce wash equipment in a laboratory setting.[1] The time it takes to thoroughly clean equipment that is hard to take apart is lengthy. Trying to clean equipment that hasn’t been cleaned thoroughly (dried, caked-on debris) takes almost a full day.
Determining Where Debris Gets Hidden
Brush Washer Unit
Vegetable matter debris was spread throughout the brush washer equipment during a wash cycle by coating bell peppers with pureed pepper/cucumber fruit pulp. This would model a cumulative real-world situation of equipment not regularly cleaned during the season. The vegetables were dumped onto the conveyor. The peppers moved into the brush washer and then to the absorber. The locations of where the debris spread were noted through a visual inspection. The equipment was then rinsed with water, the debris brushed/scrubbed off, and the equipment was then rinsed again.
“Clean” relied on visible observations. Was that enough? After eyeballing how clean the cleaning process was, the steps were repeated using pulp laced with a fluorescent powder. The powder/pulp adhered to the peppers nicely.
After the peppers ran through the wash, the equipment was cleaned as before. A UV light was used to see if any small particles were present. There were glowing specks observed in places the cleaning process had missed. The places where the glowing material remained were noted. Several revisions to the cleaning process were tried, and spots that still glowed upon inspection were again noted. These hard-to-clean locations were designated as critical cleaning points.
An important consideration was the length of time it takes to clean equipment. For each piece, the time it took to clean it was noted. Fresh debris was easier to clean from the equipment. The times ranged from 1 hour to under 3 hours, depending on how many batches ran through. This daily-use cleaning was dubbed maintenance cleaning. Long-handled scrubber sponges reached down deep into the interior housing walls. A curled, thin-bladed paint scraper cleaned the spaces between the foam doughnuts of the absorber.
If debris was allowed to dry, the time it took to clean doubled. To clean heavily accumulated, dried-on debris was dubbed a thorough deep cleaning. To deep-clean, the wash equipment was dismantled. The conveyor had the belt removed to get to the underside. The brush washer and absorber had the drive-chain guards and chains removed. The machines were then lifted and set on their sides to get to the hardest-to-reach places. The tools used for the deep cleaning were narrow-diameter bottle brushes, scrubber sponges, and long-handled scrubbers.
Root Barrel Washer
Newly harvested potatoes were dunked into water and drained. Fluorescent powder was mixed in with the tubers. Treated potatoes were run through the wash cycle in the barrel washer. After several batches of potatoes were run, the barrel washer was cleaned using various brushes, scrubbers, and pads to find what worked. UV light was used to find where soil or debris remained after the cleaning process. The treatment was executed several times to determine where the particles accumulated regularly. Critical cleaning points were noted.
A Breakdown of the Cleaning Challenge
All food contact surfaces were identified. The conveyor/brush washer/absorber had dozens of food contact surfaces. The UV light showed where debris was hidden and could be a potential source of contamination of a food contact surface: the rubber flaps on both edges of the conveyor belt, the textured surface of the belt itself (upper surface and underside), and the belt-splicing connection (resembling a zipper). Debris would routinely get stuck in these places, some of it as an oily residue. If the material dried on, it was a challenge to scrub it off. Simple rinsing wasn’t enough.
Potable water was used for rinsing. Using a water hose was adequate but sometimes cumbersome to handle. The better choice was a pump sprayer filled with hot water to rinse off debris to start. Food-grade detergent was added to the sprayer to emulsify vegetable oils and for more thorough scrubbing.
In the brush washer, debris often lodged between and within the bristle bundles. Rinsing alone didn’t remove it all. Stiff-bristle, small-diameter bottle brushes were needed to clean within bundles. Between brush bundles, a dryer vent brush worked well. Dried, caked-on debris was very hard to remove, taking more than 15 minutes per brush.
The interior surface of the brush washer needed scrubbing when the debris was dried, while a sponge was sufficient when the debris was fresh and damp. Making a long-handled scrubber sponge was needed. The scrubber was cut into a triangle shaped to fit between brush sets. To reach into the machine, the top plates on both sides of the motor mount plate had to be removed.
Replacing the rivets with machine screws or attaching hinges is recommended. The underside of the motor mount plate accumulated debris easily. The combined actions of the water nozzle spraying and brushes spinning splattered debris extensively within the interior housing. Debris accumulated between the water nozzles.
The absorber wicked water off the vegetables by the spinning sets of foam doughnuts. Oily residue would get onto the doughnuts. The interior side walls where the doughnut set axles entered the housing collected debris at these junctions. Sometimes, debris would manage to lodge between the foam doughnuts.
Small-diameter (¼-inch), stiff-bristle bottle brushes allowed for cleaning around the doughnut axles. The brush head could be bent to fit around the axles for easier cleaning. Narrow scrubber sponges were used to clean the housing. A multi-tool paint scraper with a half-circle edge was able to fit conveniently between the foam doughnuts to dislodge debris.
The root barrel washer has a simpler design; it is run by a small, top-mounted motor and chain drive, and barrel staves are connected with metal bands. A perforated water pipe allows water to spray within the barrels. As the barrel spins, root crops are added to allow the sprayed water to rinse off soil and debris.
The fluorescent powder stuck to soils after its application to the roots. Water coated the inside and outside of the wooden barrel staves, barrel bands, equipment stand, and the floor. The cleaning process consisted of a long-handled brush and a long-handled scrub pad to reach the inside of the deep barrel. A narrow brush was needed to get between the staves and tight spaces. Debris was found stuck in barrel stave cracks and splits, screw heads, spaces under the barrel rings, the drive chain, and the feeder chute.
Very-narrow-diameter bottle brushes were needed to get under the metal bands and into the screw heads. To complete cleaning activities, the washer must run to turn the barrel enough to reach all sections.
Reasonableness of Cleaning
To achieve a deep, thorough cleaning of a very dirty machine, it took about 8 hours to find the least amount of glowing vegetable debris within the equipment in areas furthest away from the food contact surfaces (for brush washer setup; 4 hours for the barrel washer). To clean equipment on a daily after-use schedule, the time was cut by more than half.
Realistically speaking, farmers will have time only in the off-season to do a deep cleaning. The reasonable expectation is for after-use maintenance cleanings to stay on top of potential contamination risk. We can talk about best practices, but farmers can only do what is financially manageable.
Recommendations for Effective Cleaning
Cleaning Basics
The four steps to cleaning are:
1. Rinse off debris.
2. Scrub thoroughly with brush/tools and use correct food-grade detergent as needed.
3. Rinse again.
4. Use sanitizer following label direc-tions. Rinse if necessary.
As taught in most farm food safety trainings, the four steps to cleaning hold true. A strict cleaning schedule should be followed to maximize the cleaning impact.
Cleaning at the end of the day of use will make cleaning easier than letting debris dry onto equipment. Older equipment should be thoroughly deep-cleaned in the off-season. Off-season cleaning also gives growers time to view where material tends to accumulate on their particular pieces of equipment. Better Standard Operating Procedures can be written with this knowledge.
An off-season thorough deep cleaning will provide a cleaned surface to start off the new season, which can then be followed with daily maintenance cleaning.
Power Washing
Although this method of cleaning may do a decent job, trying to use it inside a facility will splatter dirt and debris all over walls, ceilings, and other equipment, ultimately making more work. If the equipment is on wheels (we recommend having equipment on wheels with a foot lock to allow for easy moving), then it could be moved outdoors for cleaning.
After Cleaning
Use a sanitizer (follow label directions) to reduce the risk of hidden bacteria multiplying. Use a mixture in a sprayer to reach into the equipment for good coverage. To reduce the suitable environment for bacteria to reproduce, run a fan or a fan with a heater to dry off the cleaned equipment as quickly as possible.
Further information can be found at the Cornell Vegetable Program website: cvp.cce.cornell.edu under the Food Safety tab. There, you will find cleaning equipment checklists and narrated PowerPoint presentations with photos on the project.
Robert Hadad is an Extension Vegetable Specialist at Cornell Cooperative Extension. Before joining the Cornell Vegetable Program in 2005, he worked as an Extension Educator through both the North Carolina State University Cooperative Extension Service and the University of Kentucky Cooperative Extension Service, developing programs for growers exploring sustainable and organic agricultural production practices. The production and marketing of local foods has always been his passion through his previous Extension work and as a former owner and operator of a small vegetable-and-fruit farm in Rhode Island. Today, Robert is the team’s food safety, organic, marketing, and fresh market specialist.
Reference
1. A Kinchla, University of Massachusetts Department of Food Science. Personal communication, 2016.
Looking for quick answers on food safety topics?
Try Ask FSM, our new smart AI search tool.
Ask FSM →


